Looking for some Makerspace ideas on what to have in stock?
The first step to determine what you need to focus on while stocking your makerspace is asking “what are some Makerspace ideas that match the members’ goals?”
If you are an Elementary school, your goals may be…
- spark curiosity
- build self-esteem in STEM concepts
- Introduce students to working with their hands
If you are a Middle/Highschool, your goals may be…
- challenge students with new STEM concepts
- Introduce students to advanced careers in STEM education
- Expand student’s exposure to electronics
Or you may be a library or student center that may be caught in the middle of the two! The situation is typically a case by case basis taking into account who it is for, how much space you have, and what your budget is.
However, to simplify this thought you can categorize your makerspace as either being geared towards younger students or for older students. Making the experience relative to that student is the first step in creating the best possible experience.
That is why we broke up the following makerspace ideas into two different lists. One being “High Tech” and another being “Low Tech”.
Here are some ideas if you are trying to go high tech.
First things first, you are probably trying to build some cool robotic projects! Anything that doesn’t involve a circuit, breadboard, or microcontroller probably won’t be as exciting as using those items to create hands-on electronic projects. So let’s go over what you will need to stock in order to build these types of projects.
1. Electronic Project Kits
Any makerspace idea you find will probably include an electronics project kit. It is a lot easier than trying to come up with constant new project ideas and then sourcing the parts for all those different projects.
Consider having Creation Crate’s classroom kit for interactive learning. The kit comes with everything you need to build 12 month’s worth of projects like weather stations, LED games and strength gauges.
The kit comes with all the components you need plus instructions to build all the projects. The first month’s project is simple, and consecutive months’ projects build on previous months by becoming more complex.
It may be bias coming from us that our kit is the best, but we have 3rd party STEM accreditors like STEM.org that back the curriculum. Creation Crate’s curriculum has scored one of the highest scores on their rubric out of any of the thousands of STEM products that they have reviewed.
2. Extra Components
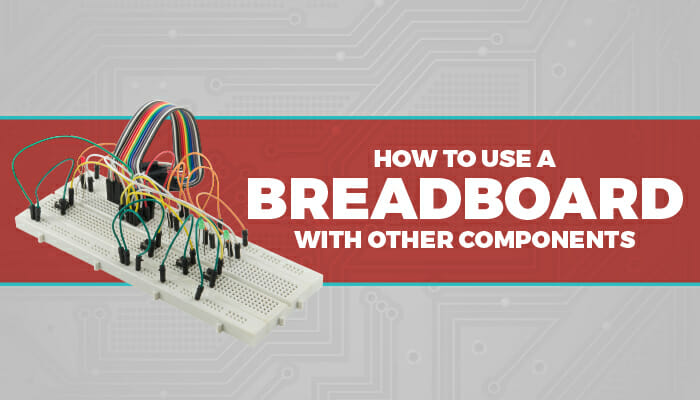
You should definitely have a plethora of breadboards, components, and microcontrollers.
The breadboards easily read signal inputs and turn it into an easy output. It’s a great learning tool and a key component of any high tech makerspace.
Arduino is an open-source computer hardware and software company, project, and user community that designs and manufactures single-board microcontrollers for building digital devices and interactive objects that can sense and control objects in the physical and digital world.
The Raspberrry Pi is a small, affordable bare-bones computer that is great for multiple makerspace projects. It has everything you need—a microUSB power connector, USB ports, an SD card slot, an Ethernet port, an audio jack, and HDMI and GPIO ports—for all your projects. You can also buy add-ons like cameras or other components.
If you want an entire list of the most popular components used to build electronic projects, click here to see the list we put together. This list has video tutorials explaining each component and what you are able to build using it.
3. 3D Printers
Not every makerspace needs a 3D printer. However, it definitely does add more flexibility in what you can create. We will take you through different types of 3D printing that match your goals best.
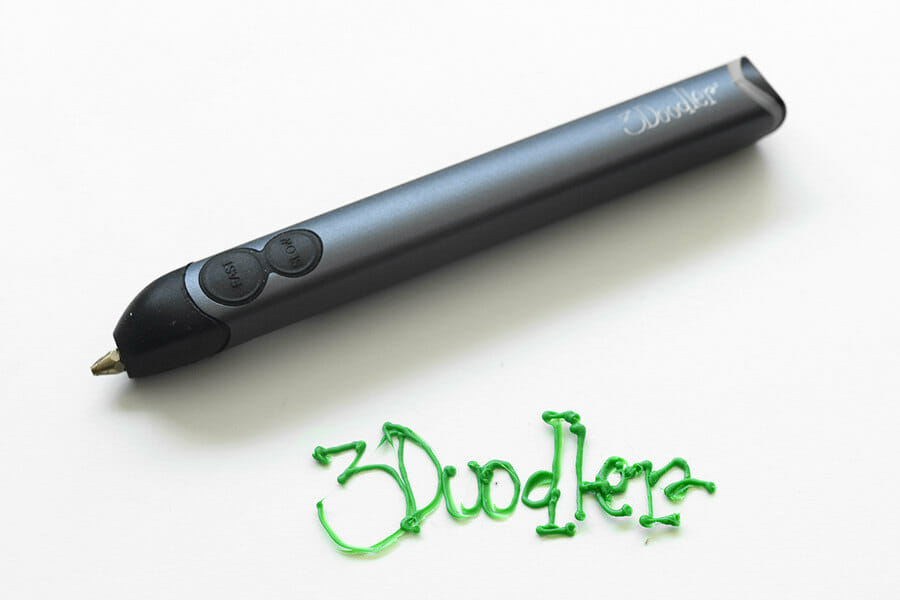
3D Printing pens are a great place to start. They are very similar to hot glue guns. The pen heats up material and squishes out whatever desired shape you want. Very similar to regular 3D printing technology but you are using your hand to create the motion.
Over the past few years, 3D printers have become more reasonable in price. The price has gone down but the features have improved. Expect to pay anywhere from $300 – $4000 depending on the 3D printer that you want.
Open source 3D printing control and slicing software has become easier to use with resources like Tinkercad.
You can use your 3D printer to build onto your projects, modify your projects, or even build items for people in the community.
Here are some of the most popular 3D printers out on the market.
Here are some ideas if you are trying to go low tech.
Now we aren’t saying a “low tech” makerspace doesn’t need to have technology. We are just saying that you probably don’t want 8-year-olds soldering or handling expensive 3D printers.
Low tech makerspaces are typically more versatile because they can accommodate a wider range of younger students (usually age 12 and under) as well as a wider range of projects like art and theater.
These makerspaces have fewer electronics and more general supplies for basic projects. Our list of comprehensive supplies is at the bottom of this article. Having these would be a great start to your makerspace.
1. Storage & Organization
No matter what activity you end up doing with the kids, it is guaranteed that it will be messy and unorganized after they are done with it. The easiest way to create a stress-free experience for everyone is to use storage boxes, storage racks, and color-coded labels.
With all these supplies, it is important to organize your makerspace. Spend some time determining the best way. First, get your students involved. If they have “skin in the game” so to speak, and help you come up with an organization system, they’re much more likely to contribute to keeping the makerspace spic and span.
Put like items together, and organize in groups in bins and other containers. Label everything! It will take some time, but it will save you so much time down the road. Most makerspaces have everything labeled. Teachers find that it helps kids self-direct to find things and to properly put things away.
Not only should you label individual components and equipment, but you should also label each box to make it easier to know what goes in it. Also label each shelf so it is easier to find where to put back storage containers on each shelf.
Just get label happy—this goes a long way to organize your makerspace for efficiency.
Color coding supplies that go together is a great way to further organize your makerspace. Put them all in a color-coded bin or box, and make sure you color code the shelf too for easy storage.
2. Supplies
The supplies you have in your makerspace are really dependent on the projects that you want to accomplish with the students. There are a lot of options out there to choose from and it can be confusing on which projects would be best.
That is why we recommend you create a list of the goals you want to accomplish and then identify what projects will help you reach those goals. This will save you money and keep you focused on things that are really necessary in your makerspace.
We put together a list of some of the most popular items that makerspaces typically will need to make most projects out there.
- Cardboard
- Duct Tape
- Painter’s Tape
- Transparent Tape
- Wood Craft Sticks
- Plastic Drinking Straws
- Paper Clips
- Binder Clips
- Conductive Fabric
- Conductive Thread
- Heat Shrink
- Neodymium Magnets
- Battery Pack
- Conductive Copper Tape
- EL Wire & Inverter
- Mod Podge
- Paper Cups & Plates
- Hook & Loop (Velcro)
- EVA Foam Sheets
- Foam Board
- Batteries
- Rubber Bands
- LEDs
- Double-Sided Tape
- Silicone (Mold Making)
- Fishing Line
- Bamboo Skewers
- Balsa Wood
- Model Magic
- Altoids Tins
- 80/20 Aluminum Extrusion
- Graphite Pencil
- Solder ( Lead Free)
- Super Glue
- Gorilla Glue
- Hot Glue Sticks
- Spray Adhesive
- Toothpicks
- Instamorph – (Moldable Plastic)
- PVC Pipe
- Acrylic Paint
- Zip Ties
- String / Yarn
- Fabric
- Brass Fasteners
- Paper ( Craft/Construction)
Summary
A makerspace in any form—high tech or low tech—allows schools to offer constructivist education. Students think of these spaces as their “anytime” space where they can go to be creative and innovative. It also helps kids on independent learning skills.
Instead of thinking of a makerspace as an alternative learning environment, these spaces embody what modern learning should really look like.
There is a maker movement that is reforming how kids are educated. The key principle is that “learning happens best when learners construct their understanding through a process of constructing things to share with others” Educators are making the shift from solely teaching in a classroom environment over to the exploration, creativity, innovation and collaboration that happens in a makerspace equipped with not only hands-on materials but also real world problems.
In a makerspace, learners create their own knowledge through interaction, and learning is self-directed. In a makerspace, students learn creative problem solving, determination and independence.
What better way to be prepared for the real world than to simulate real-world challenges and projects? Get on board! Start building your makerspace today. We can help!